See, it is possible. Just get the sticks at the craft store and then it helps to have a styrofoam block to stick them in to dry standing up (so they don't get a flat side). Follow the same procedure below, but just use the stick instead:)
Now, these are pretty simple to make, but they can be a little labor-intensive. The good thing is that if you spend a few hours on a lazy Saturday busting these out, then you can hoard them in your freezer and enjoy them whenever you please! They freeze very well, they thaw out pretty quickly and taste exactly the same as the fresh ones.
You can use your imagination with endless flavor combinations, but my absolute favorite is to use the rainbow chip cake and vanilla frosting and white chocolate candy coating. An entire boxed cake will make almost 80 cake bites, so I ususally only do half the cake at a time. And you can freeze the other half of the cake, put the other half of the frosting in the fridge and then make cake bites later!
What you'll need for 80 cake bites:
1 box cake mix of your choice
1 can frosting- flavor of your choice
about 32 ounces of candy coating chocolate
Directions:
Bake the cake as directed on the box and let cool.
Crumble the cake in a large bowl
 |
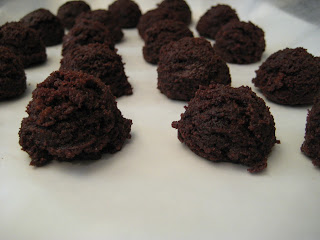
| This is actually the frozen chocolate cake I had left over from the last time I made cake bites... |
Next, form into about 1 inch balls. I like to use this handy-dandy scooper, which works perfectly.
You'll want to put them onto either a large plate, or cookie sheet- something that will fit easily into the freezer.
Freeze a few hours until firm.
Now, I've experimented a lot with these as far as the dipping-into-chocolate technique goes. I found that it is easier for me to use toothpicks.
Melt the candy coating either in a double-boiler or in a microwave-safe bowl. (if you microwave, only do 30 second intervals and stir until melted.)
* If you over-heat the chocolate, you can add a bit of solid shortening to get it back to normal
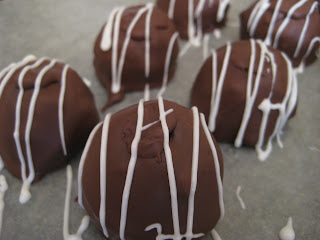
Dip each ball into the chocolate and set onto wax paper to dry. If you're going to use sprinkles to decorate, make sure you do this right away before the chocolate sets.

Gently twist the toothpick to remove. You can use the toothpick dipped in chocolate to fill the hole that was left.
If you'd rather do the whole chocolate-drizzle look, just put some melted chocolate into a plastic baggie near one corner and then cut the very tip off the corner. Gently squeeze the baggie and 'squiggle' back and forth in a zig-zag fashion. Enjoy!


No comments:
Post a Comment